 David Henderson
Key Takeaways
- The sensor probe is replaced as a part; its wiring and connector can be repaired.
- F3 means an open sensor circuit and F4 a shorted one, and neither is safe to run through.
- A code that returns after a new sensor points at the wiring, the connector or the control board.
- A sensor alone is rarely the reason to replace an oven under about twelve years old.
- Self-clean heat and rack handling are the usual ways a probe or its wire gets damaged.
The Bottom Line
Replace the sensor and test the wiring, and do not run an oven through F3 or F4. Replace the oven only when the sensor is one of several failures on an old range. The price is confirmed after on-site diagnosis, with a written estimate before work begins.
The temperature sensor is a small metal probe at the back of the oven cavity, and the control board trusts it completely. When the probe fails, the oven loses its idea of how hot it is, and the result is either no heat or heat that runs away. When people ask about GE oven temperature sensor repair or replacement, they usually want one answer, and this guide gives it, along with the larger question of when the sensor is not worth fixing because the oven is not. If you have a code, the F3 page covers it in detail.
| What you see | What it points at | Safe to keep using? |
|---|---|---|
| F3, oven barely heats or shuts off early | Open sensor circuit: burned-out probe or broken wiring | No, until repaired |
| F4, oven runs hot, food burns | Shorted sensor, reading far too cold | No, fire risk |
| Oven temperature far off, no code | Drifting sensor, or a control fault | With caution |
| Code returns after a sensor is fitted | Wiring, connector or the control input | No |
Can a GE Oven Temperature Sensor Be Repaired?
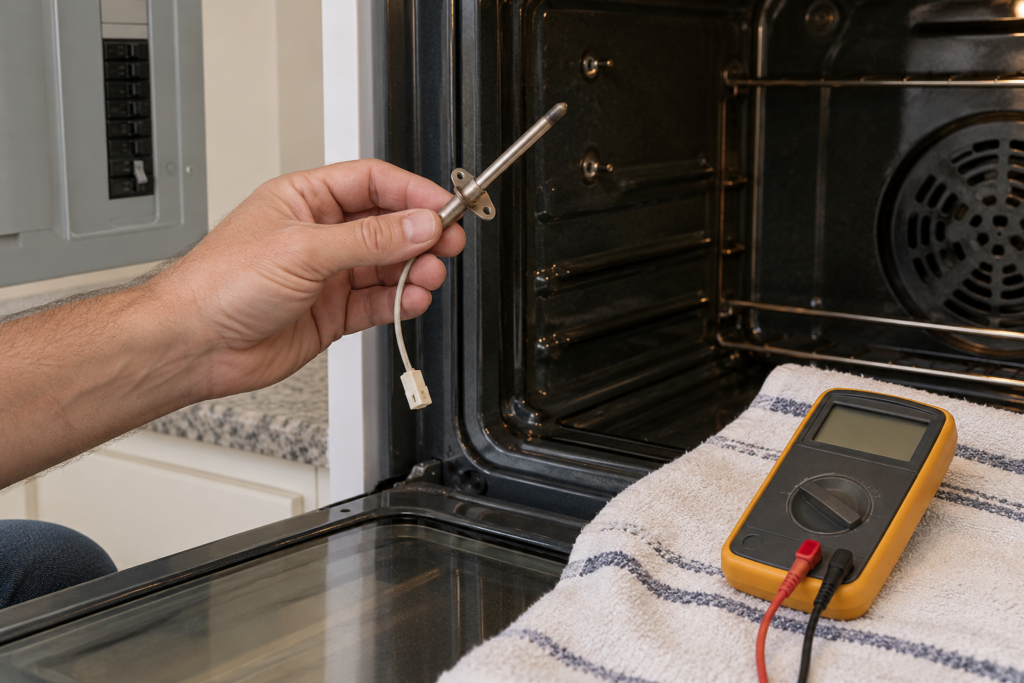
Not in the sense of mending the probe: the sensor is replaced as a part, while its wiring and connector can sometimes be repaired. On this site's F3 page, the sensor is described as a short probe on the rear upper wall of the oven cavity, held by one or two screws, with a wire running to the control board. If the probe itself has failed, a new one is fitted. If the fault is a broken or burned connector, that is repaired or replaced with it.
The same page notes that a burned connector at the board, or an input fault on the board itself, can leave a good sensor still reading wrong. That is why a technician tests the circuit before ordering a part, and why a code that returns after a new sensor goes in points at the wiring or the board.
What Do F3 and F4 Mean for a Sensor Repair or Replacement?
F3 means the sensor circuit is open, and F4 means it is shorted, and both call for a repair before the oven is used again. The F3 page says an open circuit leaves the board unable to regulate heat and warns against using the oven. The F4 page says a shorted sensor can make the oven run uncontrolled and calls it a fire hazard. Neither page treats a reset as a fix: it may clear the display, but the code returns when the fault is physical.
- F3, open. The probe has burned out or its wiring has broken or pulled free.
- F4, shorted. The probe has failed short or its wire is touching the oven body.
- Reset behavior. A breaker reset can clear the display, but the code comes straight back while the fault is physical.
- The range versions. See the range F3 page for the range wording of the same fault.
Is It Worth Replacing the Sensor or the Oven?
Replace the sensor. It is one of the smaller oven repairs, and the F4 page describes the swap as a short job with a standard screwdriver on most GE ranges, with the correct part number taken from the frame label. The oven is a different decision, and our GE oven repair or replace guide says GE ovens are worth repairing in most cases while under about twelve years old.
A sensor alone is rarely the reason to replace an oven. It becomes part of the reason when it is one of several failures on an old range, or when the board has failed alongside it.
What Does an Inaccurate Oven Look Like Without a Code?
Often food that browns faster or slower than the recipe says, or an oven that preheats far too quickly or never seems to finish. A drifting sensor does not always trip a code, so the first sign is in the cooking, not on the display. The F4 page lists food burning much faster than expected and a displayed temperature that looks too low as signs that the probe is reading falsely cold.
- Food burns early. The sensor reports colder than the oven really is.
- Food stays pale. The sensor reports hotter, or the element is being cut off too soon.
- Preheat never ends. The control never sees the temperature it is waiting for.
- Display shows dashes. The F3 page lists a readout of dashes or zero as a sign of an open circuit.
An oven thermometer on the middle rack gives you a number to hand to the technician. If it disagrees with the display by a wide margin, the sensor is a prime suspect, though a calibration setting on the control can also be at fault.
What Makes a Sensor Fail in the First Place
The F3 and F4 pages both point at heat. Self-clean cycles run far hotter than baking, and the pages say they can burn connector pins or melt wires that droop against the oven wall. A wire snagged while an oven rack is installed can also break.
- Self-clean heat. Can burn connectors and melt insulation near the probe.
- Rack handling. A rack pushed in carelessly can snag or bend the probe.
- Age. The probe's internal element eventually fails.
- A loose connector. The F3 page lists a wire pulled free as a cause, and that is a repair, not a new part.
After any self-clean, a glance at the probe and its wire is cheap protection.
What Not to Do With a Suspect Sensor
Do not bypass the sensor and do not keep running the oven through a code. A shorted probe gives the board a falsely cold reading, so it drives the elements harder, and the oven overheats before it shuts down. Do not test wiring with the power on, and do not open the control area. Turn the breaker off before touching the probe, and let the oven cool first.
A multimeter check of the probe is possible for someone careful, and the F3 page gives the resistance a healthy probe should show at room temperature, but a technician will also test the wiring and the board, which a probe test alone does not cover.
Before You Book the Repair
The sensor is a repair that rewards a good description. A technician who knows the code, the model and whether the oven is a single or a double, and which cavity shows the fault, can bring the right probe on the first visit. On a double wall oven each cavity has its own sensor, so say which one it is.
Note the code, when it appears and what the oven did. Our GE oven not heating guide covers the other causes of a cold oven. Oven repair covers sensors, wiring and boards, and the price is confirmed on site after diagnosis, with a written estimate before work begins. Schedule a visit or contact us with the code and the model number.